构建自己的聊天机器人(及如何接入微信)

Chatbot的开发框架

目前聊天机器人的云服务在各大公司中都有自己的框架,例如Facebook, 微软, Google以及IBM的Watson等。开源的框架中,基于机器学习的聊天机器人不多。其中,ChatterBot算是比较简洁(换种说话就是功能还比较弱)的一个,项目活跃, 文档清晰,代码也算干净利落。

具体说来,ChatterBot是一个基于机器学习的聊天机器人引擎,构建在python上,可以从已有的对话中学习, 该项目的设计允许它接入任何语言。

其特性:

  • 一个未经训练的ChatterBot机器人,并没有与用户交谈所需的知识。
  • 每当用户输入一句话,机器人将存下它,同时也存下答复的句子。
  • 随着机器人接受的输入的增加,它能够回答的问题的数量和准确度都会相应提升.

实现原理:

  • 首先从已知句子中匹配出与用户输入最相近的句子(如何衡量相近, 大家可以想想);
  • 之后找到最有可能的回复,那么如何得出最有可能的回复呢?由所有和机器交流过的人们,对这个输入问题(匹配过的)的各个回答的频率决定;

    环境搭建

Python3

  • By default, python3.5.2 is installed in Ubuntu 16.04
  • sudo apt-get install -y python3-pip
  • pip3 install package_name

Installing ChatterBot from source

Checking the version of ChatterBot that you have installed

1
2
python3 -m chatterbot --version
0.7.6

我用的是当前最新的版本0.7.6。

快速入门

开发第一个入门的机器人例子。

myfirstchatbot.py

1
2
3
4
5
6
7
8
9
10
11
12
13
14
15
16
17
18
19
20
21
22
23
24
25
26
27
28
29
30
31
32
33
# -*- coding: utf-8 -*-
from chatterbot import ChatBot
from chatterbot.trainers import ChatterBotCorpusTrainer
chatbot = ChatBot("ChineseChatbot1")
chatbot.set_trainer(ChatterBotCorpusTrainer)
chatbot.train("chatterbot.corpus.chinese")
question = '早上好'
response = chatbot.get_response(question)
print(question)
print(response)
print("###########################################")
question = "很高兴认识你"
print(question)
print(chatbot.get_response(question))
print("###########################################")
question = "嗨,最近如何?"
print(question)
print(chatbot.get_response(question))
print("###########################################")
question = "复杂优于晦涩"
print(question)
print(chatbot.get_response(question))
print("###########################################")
question = "面对模棱两可,拒绝猜测的诱惑."
print(question)
print(chatbot.get_response(question))
print("###########################################")
question = "生命、宇宙以及世间万物的终极答案是什么?"
print(question)
print(chatbot.get_response(question))
print("###########################################")

运行 python3 myfirstchatbot.py, 结果如下:

1
2
3
4
5
6
7
8
9
10
11
12
13
14
15
16
17
18
19
20
21
conversations.yml Training: [####################] 100%
greetings.yml Training: [####################] 100%
trivia.yml Training: [####################] 100%
早上好
很高兴认识你
###########################################
很高兴认识你
谢谢你。你也一样.
###########################################
嗨,最近如何?
挺好
###########################################
复杂优于晦涩
简单优于复杂.
###########################################
面对模棱两可,拒绝猜测的诱惑.
你似乎很熟悉Python之禅
###########################################
生命、宇宙以及世间万物的终极答案是什么?
你想了解哪方面?
###########################################

需要注意的是:

  1. 中文支持需要使用Python3,中文语料库使用chatterbot.corpus.chinese。
  2. Chatterbot默认情况下会学习每一次输入,可以通过chatbot = ChatBot(“…”, read_only=True)设置成只读模式。

API接口

把聊天机器人封装为api服务,这样它的使用场合就不受限制了,能服务于任何http client。

另一个原因是,微信接入脚本是python2的,而中文聊天机器人脚本基于python3。

创建API服务

使用hug作为API服务的框架,

1
安装依赖:pip3 install hug

创建bot_api.py:

1
2
3
4
5
6
7
8
9
10
11
12
13
14
15
16
17
18
#!/usr/bin/env python
# coding: utf-8
from chatterbot import ChatBot
from chatterbot.trainers import ChatterBotCorpusTrainer
import hug
weixinchatbot = ChatBot("weixinchatbot")
weixinchatbot.set_trainer(ChatterBotCorpusTrainer)
# 使用中文语料库训练它
weixinchatbot.train("chatterbot.corpus.chinese") # 语料库
@hug.get()
def get_response(user_input):
response = weixinchatbot.get_response(user_input).text
return {"response":response}

启动API服务

运行hug -f bot_api.py:
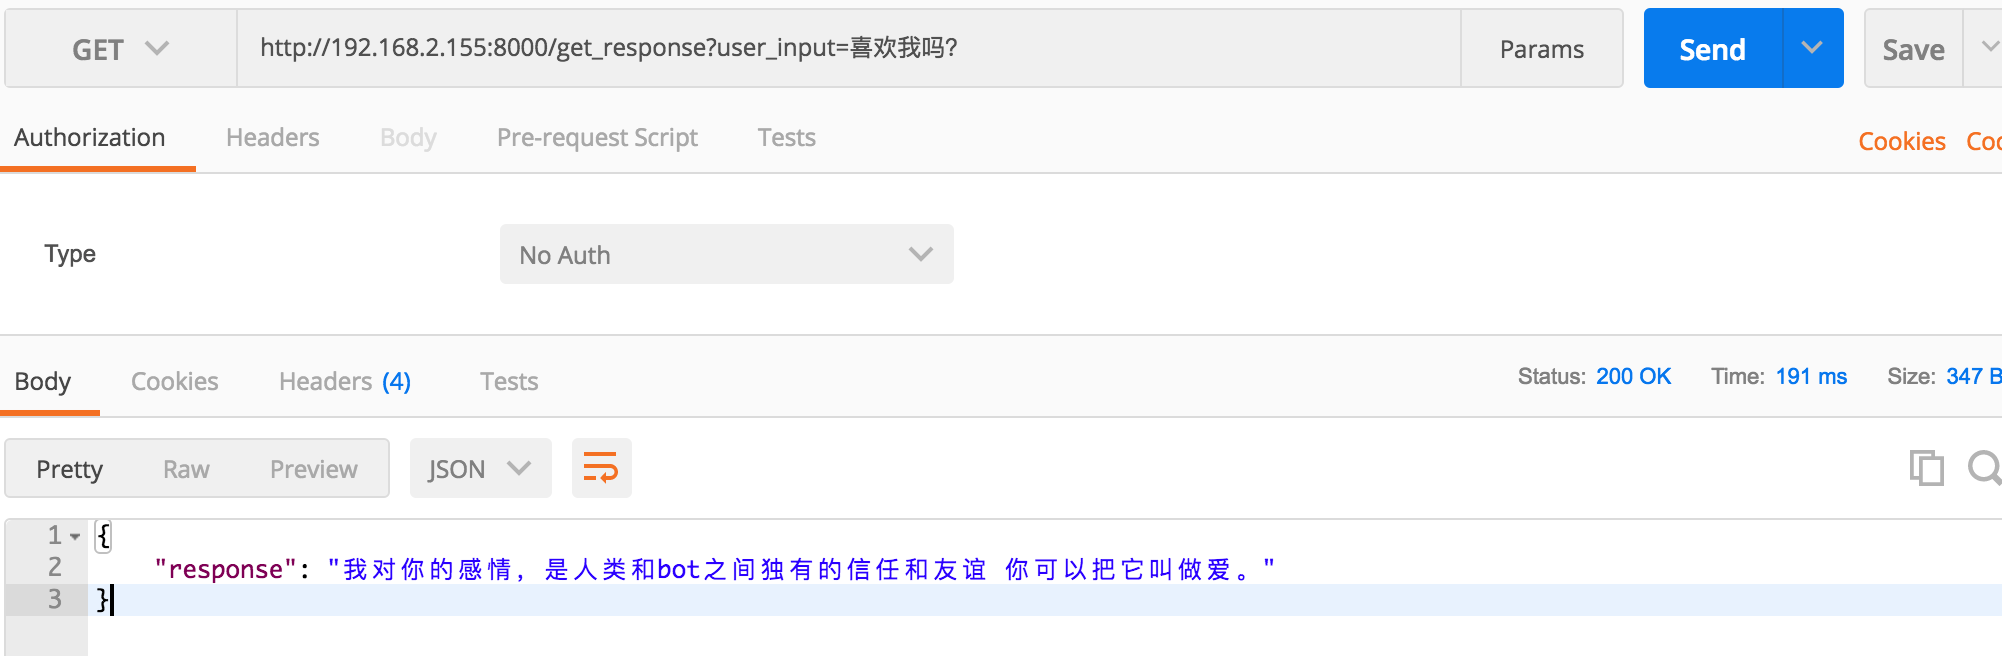
1
2
3
4
5
6
7
8
9
10
11
12
13
14
15
16
17
18
19
20
21
22
23
24
25
26
27
28
29
xiningwang@ubuntu:~/ChatterBot/examples$ hug -f bot_api.py
conversations.yml Training: [####################] 100%
greetings.yml Training: [####################] 100%
trivia.yml Training: [####################] 100%
/#######################################################################\
`.----``..-------..``.----.
:/:::::--:---------:--::::://.
.+::::----##/-/oo+:-##----:::://
`//::-------/oosoo-------::://. ## ## ## ## #####
.-:------./++o/o-.------::-` ``` ## ## ## ## ##
`----.-./+o+:..----. `.:///. ######## ## ## ##
``` `----.-::::::------ `.-:::://. ## ## ## ## ## ####
://::--.``` -:``...-----...` `:--::::::-.` ## ## ## ## ## ##
:/:::::::::-:- ````` .:::::-.` ## ## #### ######
``.--:::::::. .:::.`
``..::. .:: EMBRACE THE APIs OF THE FUTURE
::- .:-
-::` ::- VERSION 2.3.1
`::- -::`
-::-` -::-
\########################################################################/
Copyright (C) 2016 Timothy Edmund Crosley
Under the MIT License
Serving on port 8000...

API服务调用

接入微信

基于wxBot项目,使得用代码与微信交互,这样一来使聊天过程(input/output)可编程,可以让聊天机器人接管我们的聊天。

wxBot脚本到本地:

1
wget https://raw.githubusercontent.com/liuwons/wxBot/master/wxbot.py

创建wechat_bot.py:

1
2
3
4
5
6
7
8
9
10
11
12
13
14
15
16
17
18
19
20
21
22
23
24
#!/usr/bin/env python
# coding: utf-8
from wxbot import WXBot
import requests
bot_api="http://127.0.0.1:8000/get_response"
class MyWXBot(WXBot):
def handle_msg_all(self, msg):
if msg['msg_type_id'] == 4 and msg['content']['type'] == 0:
user_input = msg["content"]["data"]
payload={"user_input":user_input}
response = requests.get(bot_api,params=payload).json()["response"]
#print(type(response)) # unicode
self.send_msg_by_uid(response, msg['user']['id'])
def main():
bot = MyWXBot()
bot.DEBUG = True
bot.conf['qr'] = 'png'
bot.run()
if __name__ == '__main__':
main()

安装依赖:pip install requests pyqrcode pypng Pillow

开始运行(使用python2):python wechat_bot.py

之后扫码登录即可